Guides & Manuals
Undress A Redback™
To request more information, please fill out the form below and a Redback™ Drilling Tools & Manufacturing representative will be in touch with you as soon as possible.
Video Guide to Undressing a Roller Reamer
Tools Required For Undressing are:
- Socket wrench with square drive
- Large Screwdriver
- In-hex Socket for wedge bolt (with new kit)
- Lifting Strap (with new kit)
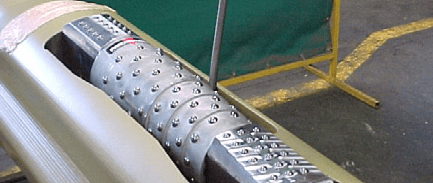
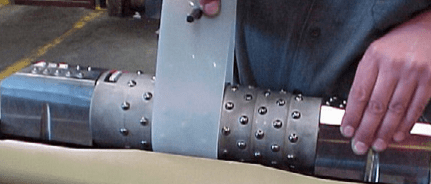
Prior to disassembly, remove all dirt, mud, cement from the reamer. High pressure wash may be used on stubborn drilling mud. Body may be dressed in a vertical or horizontal position.
If the body is to be undressed in the horizontal position, ensure that the body is retained from moving around during disassembly. We recommend a stand on each end of the body to raise it off the ground up to a workable level.
Step by Step Guide to Undress a Redback™ Reamer
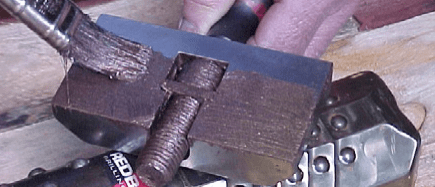
1. Clean out holes above the centre bolt of each wedge. Compressed air may be used to free small amounts of drilling mud from areas that did not get cleaned by
the pressure wash. Check the wedge, block and body for metal pressed over into bolt holes. If found, remove pressed over metal before going to the next step.
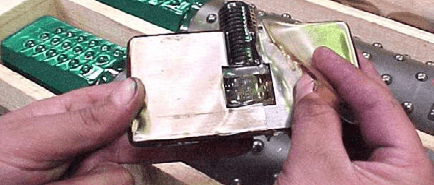
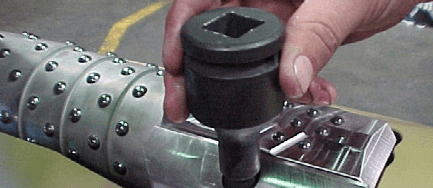
2. Find the In-hex socket that comes with a new redress kit. Size will depend on the redress kit being used. Place it in the centre wedge hole. Push the In-hex socket down until you are sure it is at bottom. With the square drive bar attached, turn anti-clockwise until you can remove the wedge from the cartridge.
3. Repeat for the second wedge in
the same cartridge.
4. With both wedges removed, use a large screw driver to move the cartridge into the middle of the pocket.
Note: If the bolt is hard to turn, then screw back in the hole. Remove the In-hex socket, add drill collar compound into the bolt hole, between the head of the bolt and the wedge. Continue to remove the bolt and repeat if necessary
Dress A Redback™
To request more information, please fill out the form below and a Redback™ Drilling Tools & Manufacturing representative will be in touch with you as soon as possible.
Video Guide to Dressing a Roller Reamer
Tools Required for Dressing
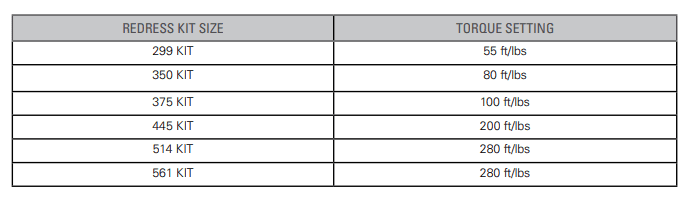
• Torque Wrench (see chart on page 6 for setting).
• In-hex Socket for wedge bolt (with new kit).
• Drill Collar compound (with soft flat brush).
• Gauge ring
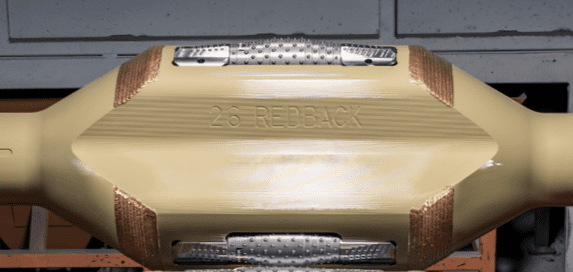
Clean out the pocket area of the reamer, ensuring that all surfaces are free from foreign material, this includes down inside the taped holes. Check the edge of all pockets for steel that has been rolled, bruised, or hit over into the pocket surfaces. If this is the case, then remove metal until flush before dressing.
How to Dress a Redback™ Reamer
1. Obtain a new set of cutters and remove from the box, (check on the side of the box to see if you have the correct size of cutters).
2. Remove the protective wax from all parts, place on clean surface.
3. Check body for metal pressed over into pocket area, if found remove metal until flush.
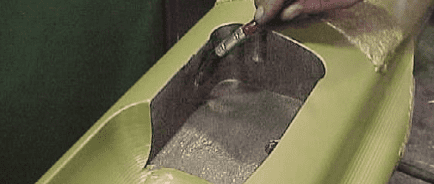
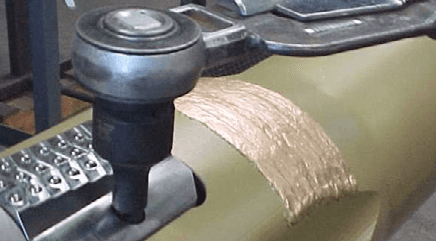
4. Coat the inside surfaces of the pocket with a clean drill collar compound, use flat soft brush for application, (see footnote at end).
5. Lower cutter cartridge into pocket, push down to bottom of pocket. Move cartridge to side of pocket until it reaches face opposite drilled holes in bottom of pocket
6. Obtain one wedge and bolt assembly, also the In-hex socket drive (complete with kit). Enter the drive into the top of the wedge, then into the bolt head, hold drive and coat both sides of the wedge as well as the bolt thread with a drill collar compound. (See footnote.)
7. Lower the wedge, bolt and In-hex socket into the area adjacent to one of the blocks. Screw down to bottom of pocket by HAND ONLY
8. Repeat for the second wedge in the same cartridge.
9. With both wedges in place and from the Torque setting chart at the end slide, obtain the correct foot/pounds for the size of cartridge being used. Set the wrench to the correct setting and pull down both bolts until the torque wrench trips out.
10. Repeat steps 3 to 9 for the second and third pockets.
11. Use Gauge Ring to check the size of Reamer before running in hole.
Note: If the bolt is hard to turn, then screw back in the hole. Remove the In-hex socket, add drill collar compound into the bolt hole, between the head of the bolt and the wedge. Continue to remove the bolt and repeat if necessary
Manual PDF
The Redback™ Field Operations Manual can be found with every Redback™ Roller Reamer and contains vital information to the operational maintenance of Redback™ components. Information such as assembly and installation instructions are included together with a basic troubleshooting guide.
For an electronic version of the document, please click the document below.
